
Shogun 2 Hammer and Anvil: Cavalry Flanking Walkthrough
Practice classic Shogun 2 hammer and anvil with three verified video steps: dismount Katana Cavalry, pin spear infantry and strike an exposed flank.
FAQ
Do I need Katana Cavalry for every hammer-and-anvil attack?
Should both groups charge the spear line from the front?
Can dismounted cavalry always remount safely?
What does this cavalry demonstration teach?
Use this drill when the enemy spear line makes a mounted frontal charge a poor choice. The video shows Katana Cavalry fighting on foot while a separate mounted force attacks around the engagement. Learn the order of those decisions before trying to reproduce the result with a campaign army. The screenshots come from one classic Sengoku demonstration; they do not validate Complete Edition balance.
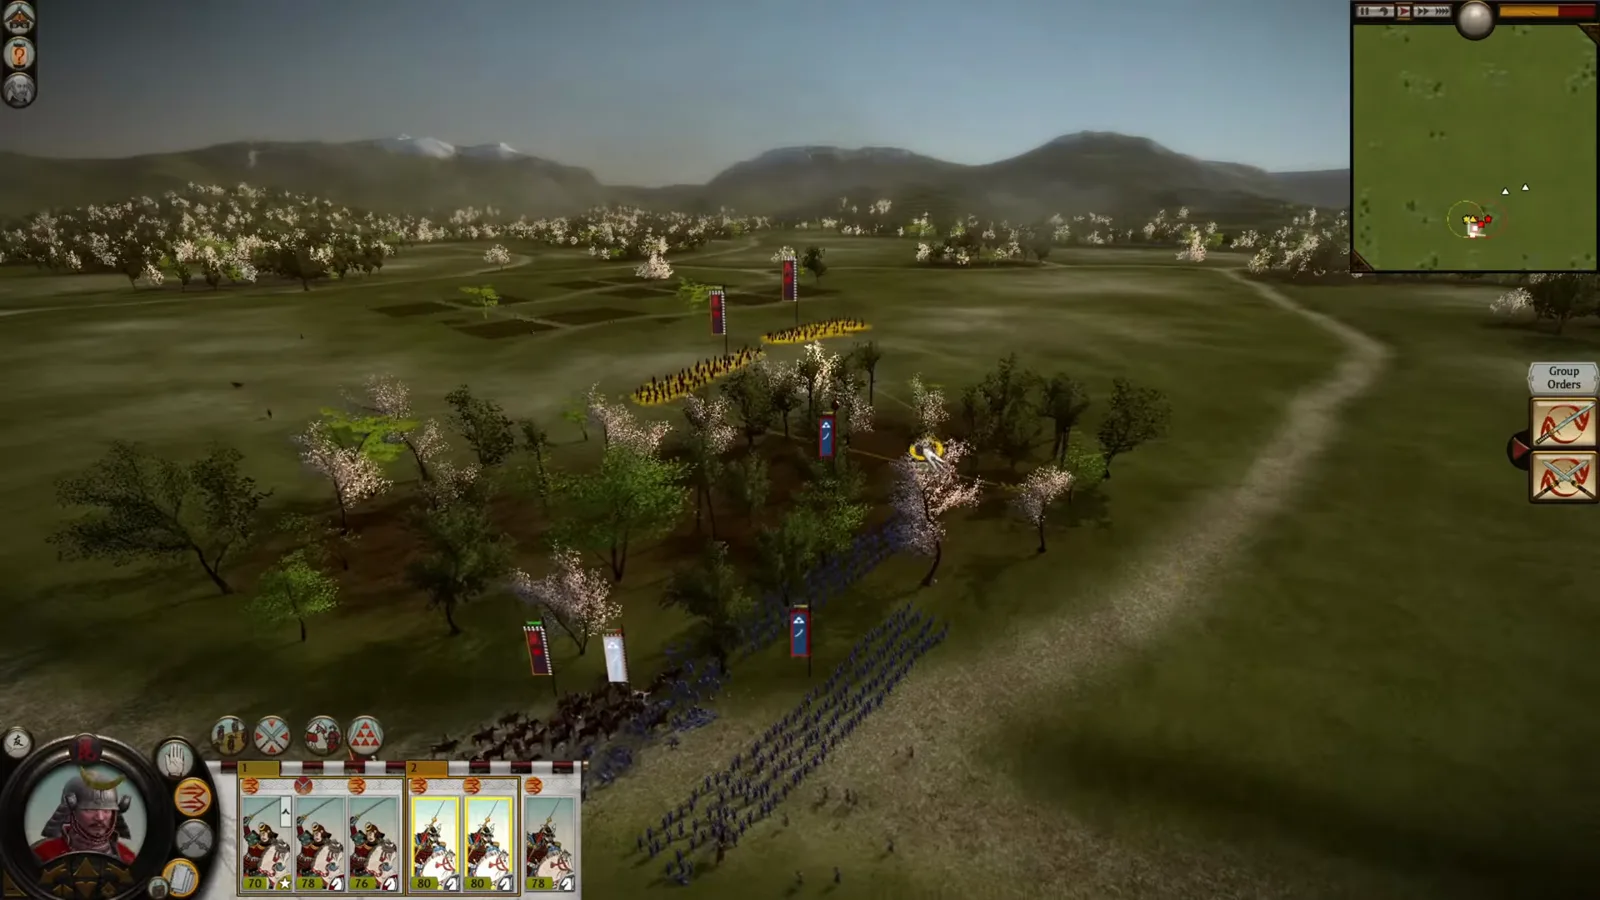
A separate cavalry engagement from the same video illustrates the two-direction attack. It is not the starting frame of the three-step drill below. 3:17.
Source and scope
Original explanation and gameplay: Dishonorable_Daimyo — Shogun 2 Tips & Tactics: Hammer & Anvil. The whole transcript was reviewed; these three frames focus on the dismounted-cavalry example at 3:41–3:57. Commentary here is independently written. Gameplay belongs to Creative Assembly / SEGA; the recording belongs to its creator.
1. Separate the holding force from the mounted force
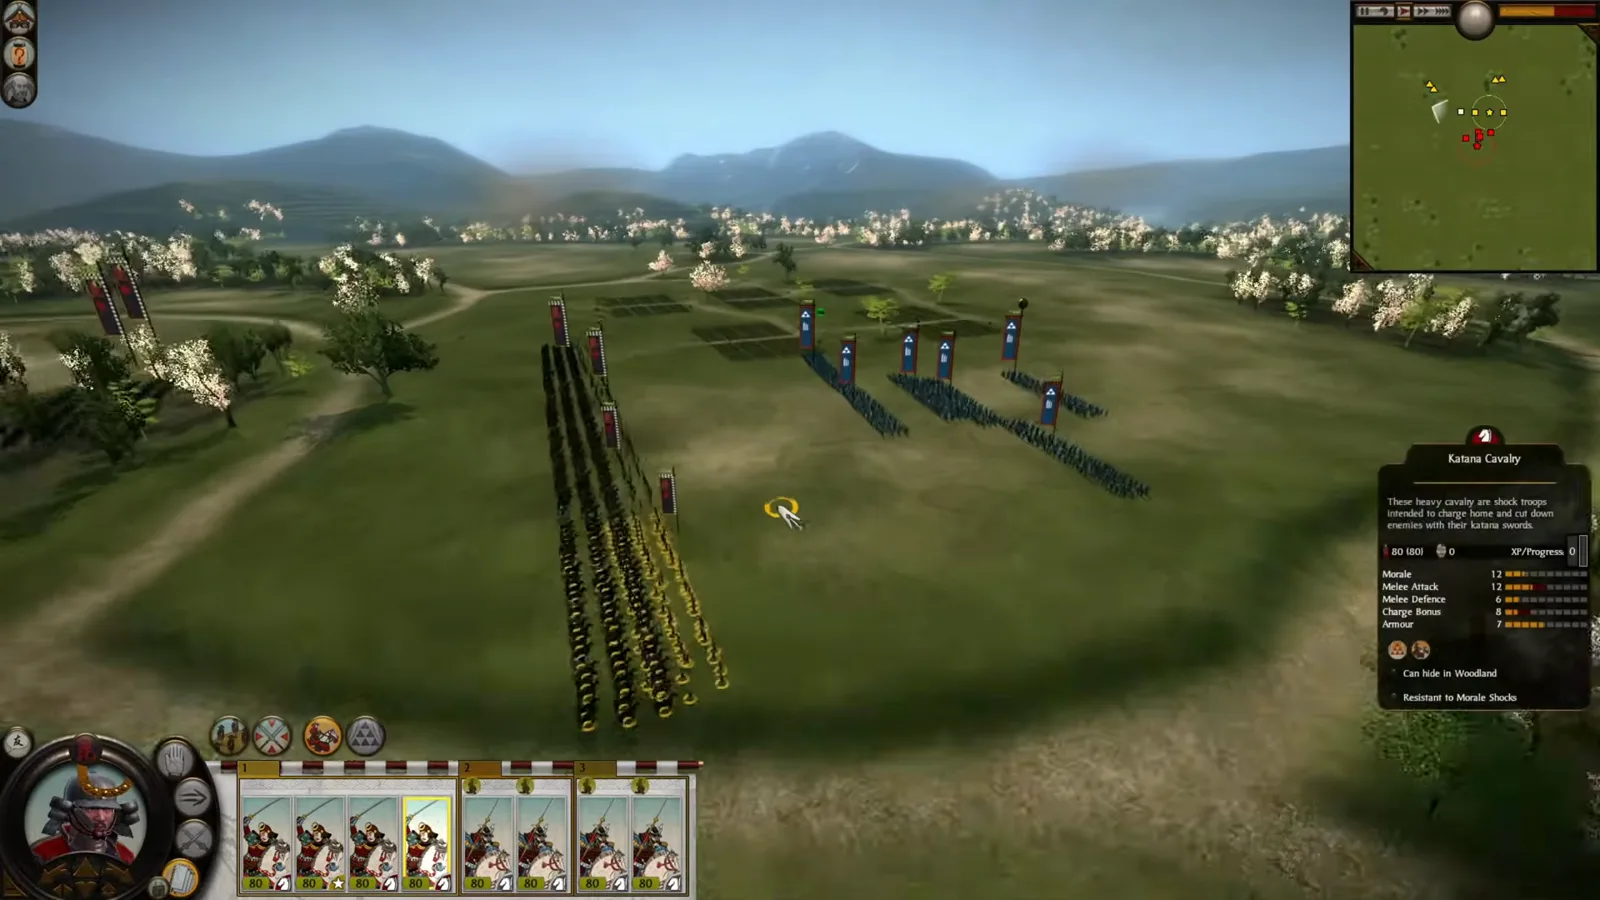
Select the Katana Cavalry intended to hold the enemy and dismount it before engagement. Keep the other cavalry mounted and out of the spear frontage. In the frame, the selected Katana Cavalry stands on foot in a line, with its horses behind it. Do not read the displayed statistics as a Complete Edition reference.
2. Send the dismounted line to engage the spears
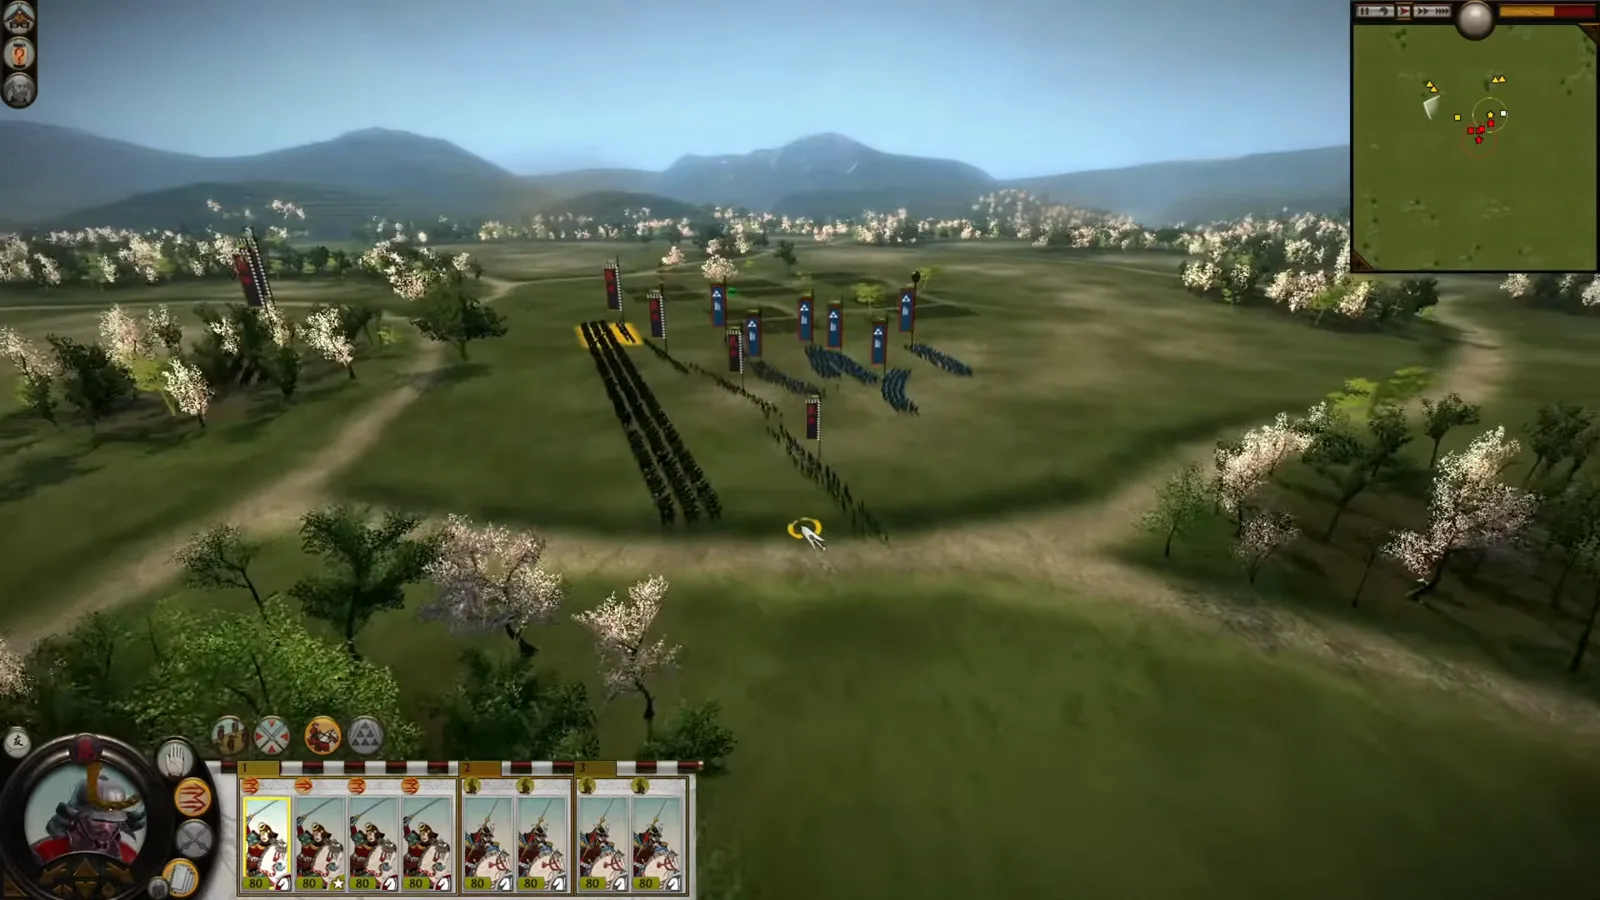
Move the dismounted troops toward the enemy line while preserving room for the mounted force to move around it. The screenshot catches this approach, before the lines have fully engaged. Let the holding force occupy the spears rather than ordering every unit into the same frontal attack.
3. Commit the mounted flank after the target is occupied
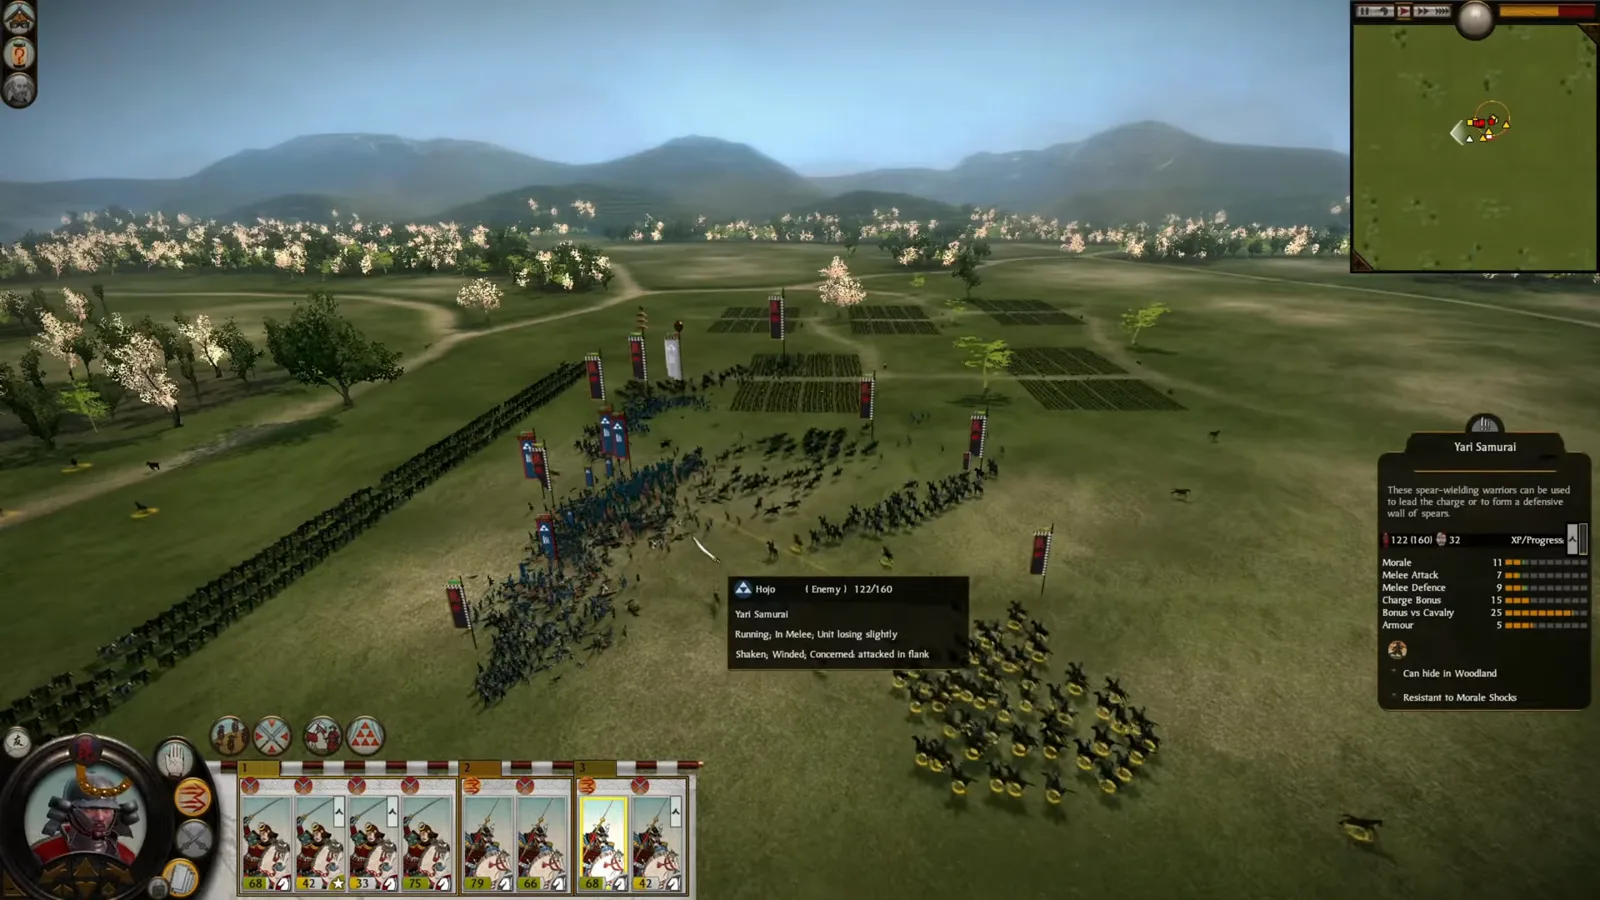
Once the enemy is fighting the dismounted troops, bring the mounted force around the exposed side. In this frame, the enemy Yari Samurai tooltip reports concern about a flank attack while mounted troops enter the melee. Watch the enemy reserves and your own losses; this example does not guarantee that every flank charge breaks every target.
Shogun 2 Hammer and Anvil: Cavalry Flanking Walkthrough
What should you check when the attack stalls?
If the enemy turns to face your cavalry, the holding force has not fixed it in place. If the cavalry becomes trapped, reassess the approach and withdraw when possible rather than feeding the entire force into spears. The video warns that nearby missiles can scatter unattended horses and prevent remounting. Keep that risk in mind before treating dismounted cavalry as ordinary infantry.
Does this work unchanged in the other editions?
No. The video discusses Fall of the Samurai separately: firearms, friendly fire and clear lines of sight change the problem. Complete Edition also corrects infantry fatigue, according to the official changes. Use this page to learn positioning in classic Sengoku, not to infer hidden bonuses, exact charge timings or cross-edition results.
Related practice
Related Articles
Guides
Shogun 2 Agents Guide: Ninja, Metsuke and Monk Roles
Choose the right Shogun 2 agent for scouting, sabotage, tax income and religion. Learn recruitment routes, counterplay and mission risks in classic Sengoku.
Guides
Shogun 2 Siege Attack Guide: Gates, Walls and the Keep
Attack castles in classic Shogun 2 with a route-based siege plan. Follow illustrated gate, wall and courtyard examples, with source-video timestamps.
Guides
Shogun 2 Siege Defense: Castle Positions and Reserves
Defend castles in classic Shogun 2 with illustrated positions for archers, melee troops, cavalry and reserves. Learn when to sally out and check tower control.
Was this helpful?
Thanks for the feedback!